Minting with Marmalade V2 Tutorial
Welcome to the Minting with Marmalade V2 tutorial! Marmalade is a revolutionary NFT marketplace infrastructure built on the Kadena blockchain. It offers 100% on-chain transactions, high-quality provenance, low gas fees, and shared ownership that can span platforms. Marmalade is designed to handle the security, scalability, and future-proofing of your NFT marketplace, allowing you to focus on your offering, audience, and revenue.
This tutorial will guide you through the process of creating and minting an NFT on Marmalade using the Chainweaver development tool. Chainweaver is a blockchain wallet and development environment created by Kadena, which allows you to interact with the Kadena blockchain in a user-friendly way.
Let's get started!
Step 1: Authenticate and Locate Marmalade v2 in Chainweaver
To begin, you need to authenticate on Chainweaver. Once you're authenticated, navigate to the Module Explorer to find the Marmalade v2 contracts.
In the Module Explorer, search for the following string:
n_fa5008565e171dca599c6accfd71d6006ddecce0.ledger
This will locate the Marmalade v2 contracts.
Once you find the contracts, click on "View" to proceed.
Step 2: Create a Token ID
The first step in interacting with the Marmalade v2 contracts is to create a
token ID. You can do this by calling the create-token-id function.
You can find this function on the left-hand side of the screen. Click on "Call" to bring up a popup where you can enter the token details.
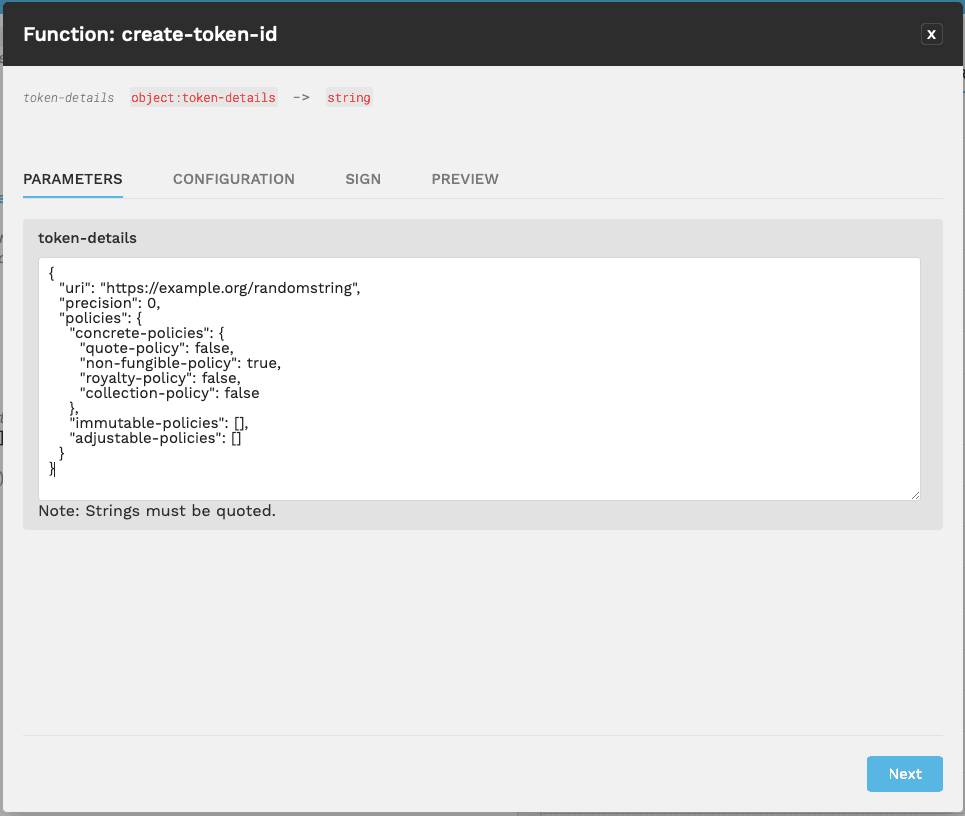
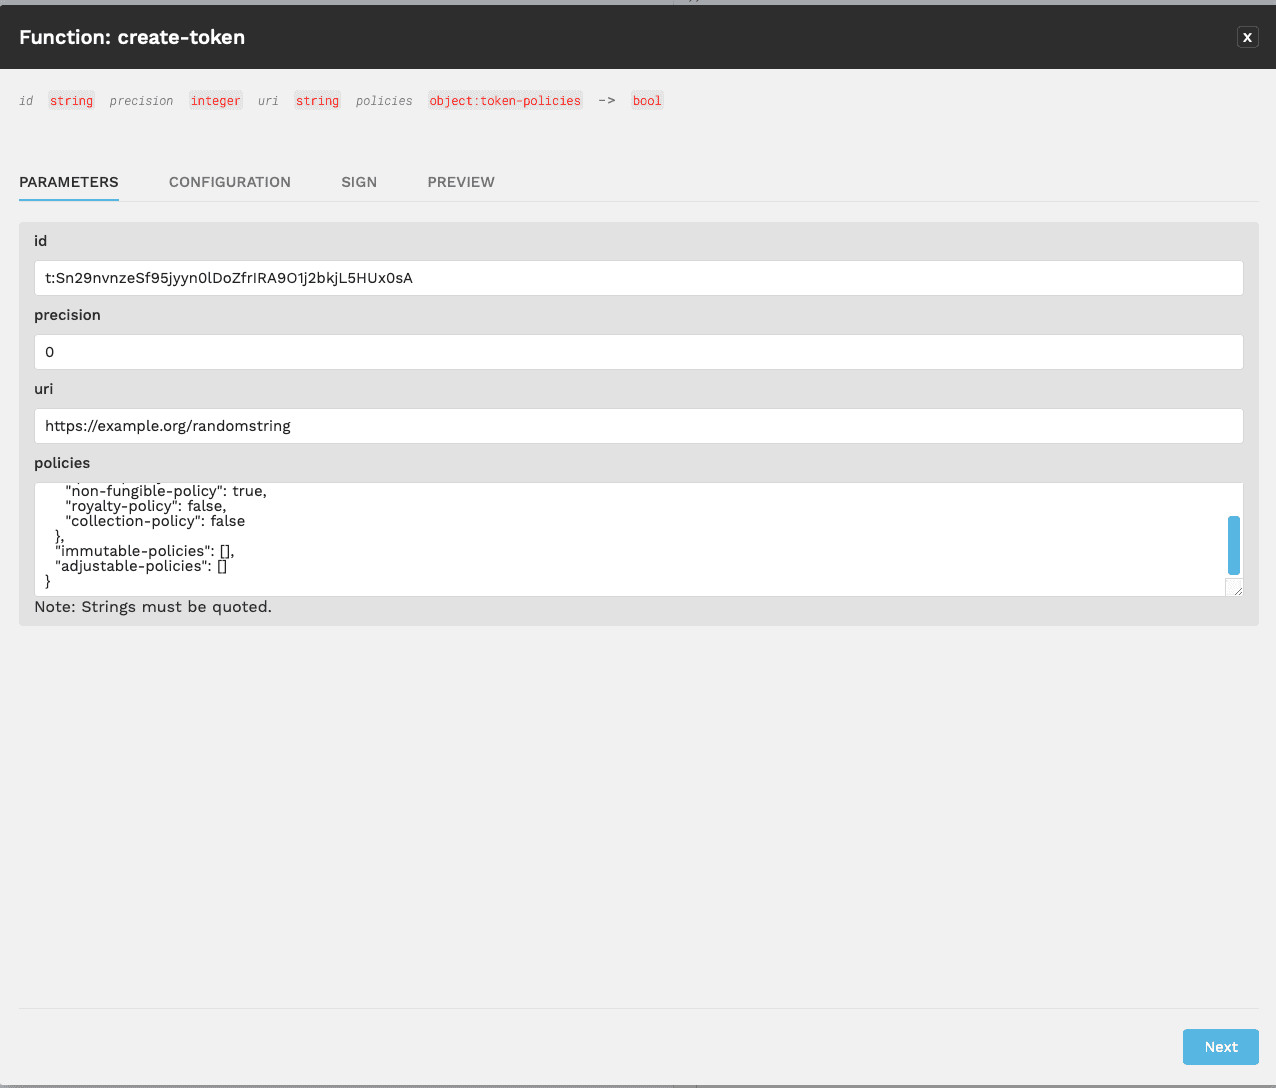
The token details should be entered as a JSON object with the following fields:
uri: This needs to be a valid and unique URL. Each user should create a random URL to ensure uniqueness. For example, you could add a random string to the end of a base URL, like "https://example.org/randomstring".precision: Set this to 0 for an NFT (Non-Fungible Token).policies: This is an array that includes various policy settings for the token. For now, we will only set thenon-fungible-policyto true, indicating that the token is an NFT. The other policy settings are more advanced and will be left blank for now.
Here's an example of what the JSON object might look like:
{
  "uri": "https://example.org/randomstring",
  "precision": 0,
  "policies": []
}
{
"uri": "https://example.org/randomstring",
"precision": 0,
"policies": []
}Note: For more information on token policies, please refer to the Marmalade V2 Token Policies documentation on GitHub.
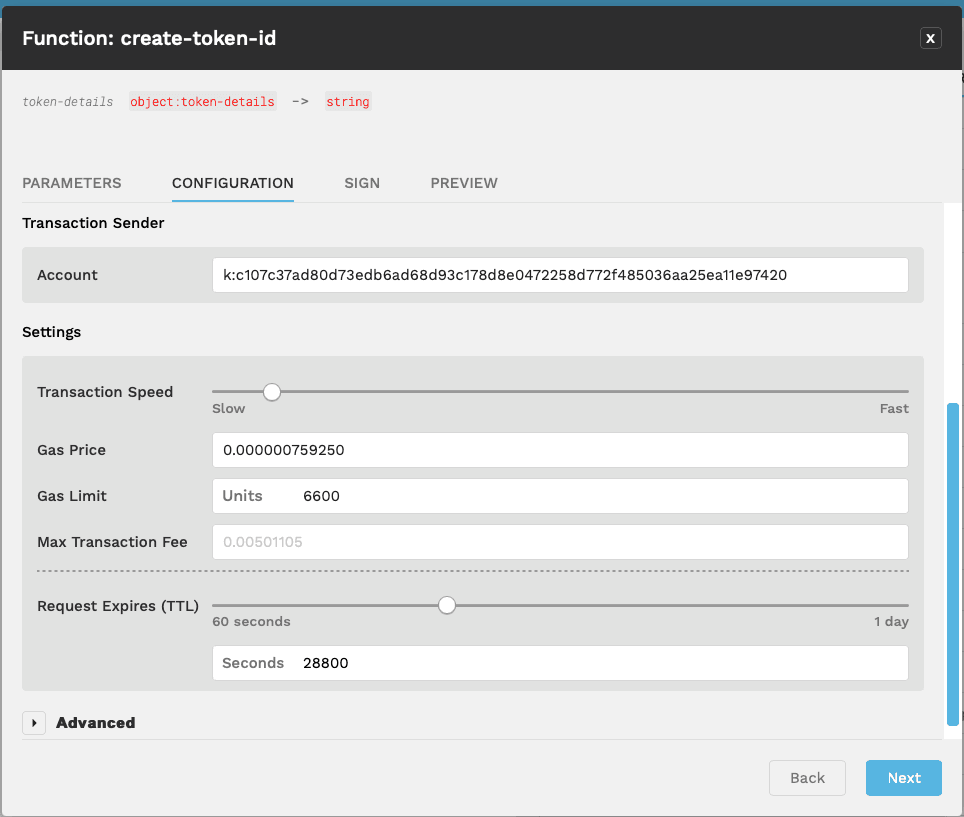
Next, go to the Configuration tab. Paste your account name and change the gas settings to match the screenshot below.
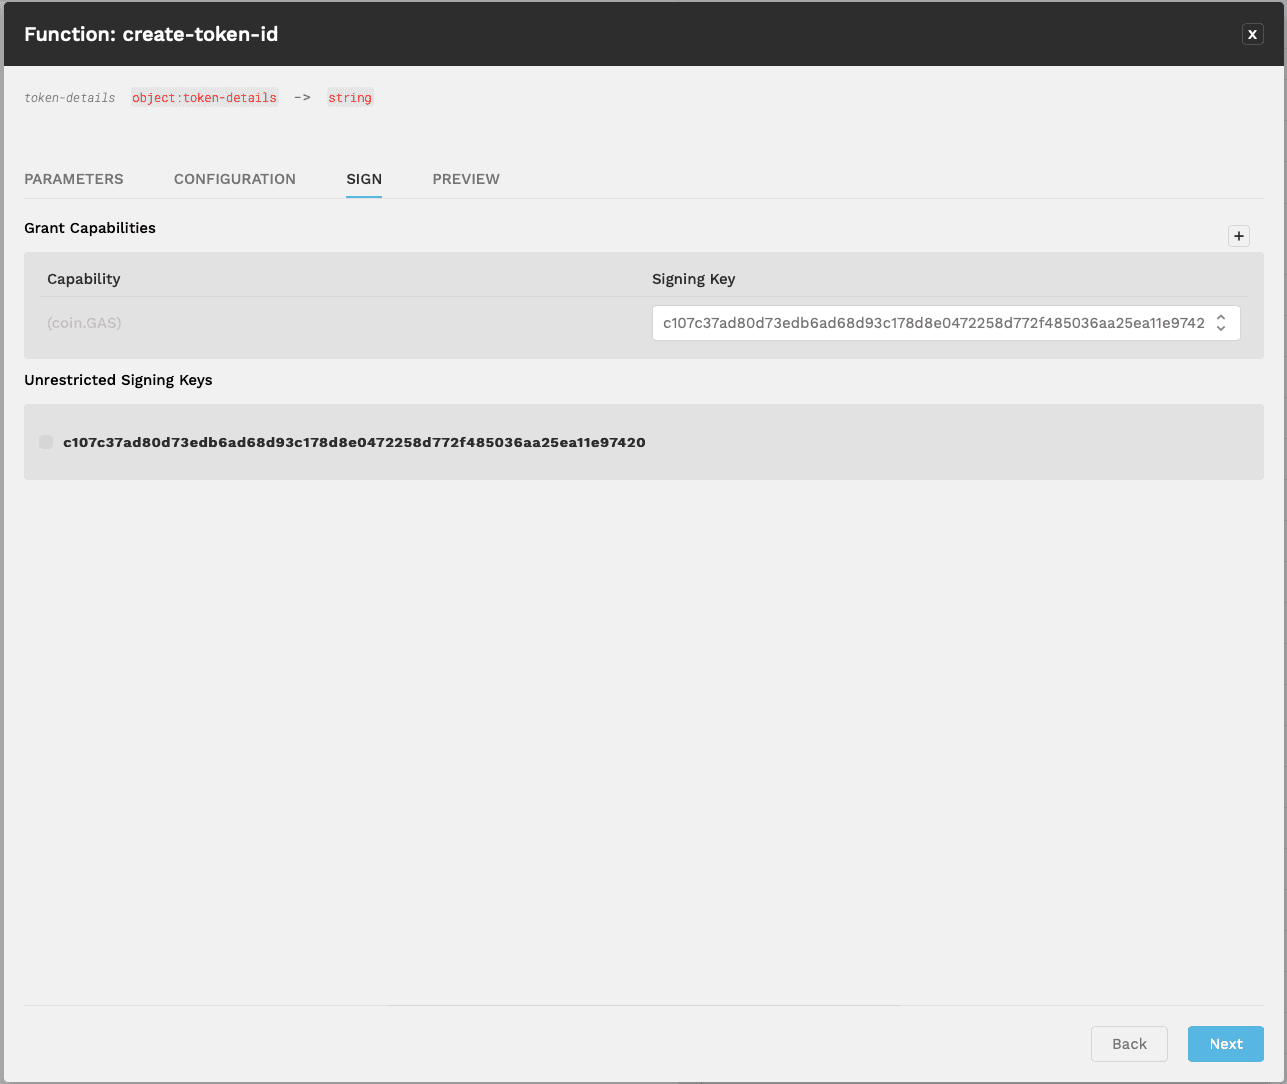
On the Sign tab, choose your keyset from the Grant Capabilities dropdown.
Finally, if there are no errors on the Preview screen, submit your transaction. You will need to wait for the transaction to go through in order to receive the token ID that you created.
Step 3: Create a Token
After creating a token ID, the next step is to create a token. You can do this
by calling the create-token function.
You can find this function in the same menu as the create-token-id function.
Click on "Call" to bring up a similar popup as before. In the Parameters screen,
you'll need to enter the following information:
- Token ID: This is the token ID you received from the
create-token-idfunction call. It should look something liket:nxu1L4_BZlUvNALgJvN5Kgkk7qYO3HSi0JnLtU3Ke4I(no quotes). - Precision: Enter
0, just like you did when creating the token ID. - URL: Use the same URL you used when creating the token ID. In our
example, it was
https://example.org/randomstring. - Policies: In this field you can add some of the default or custom policies that you want to apply to the token. For now, we will leave this with an empty Array.
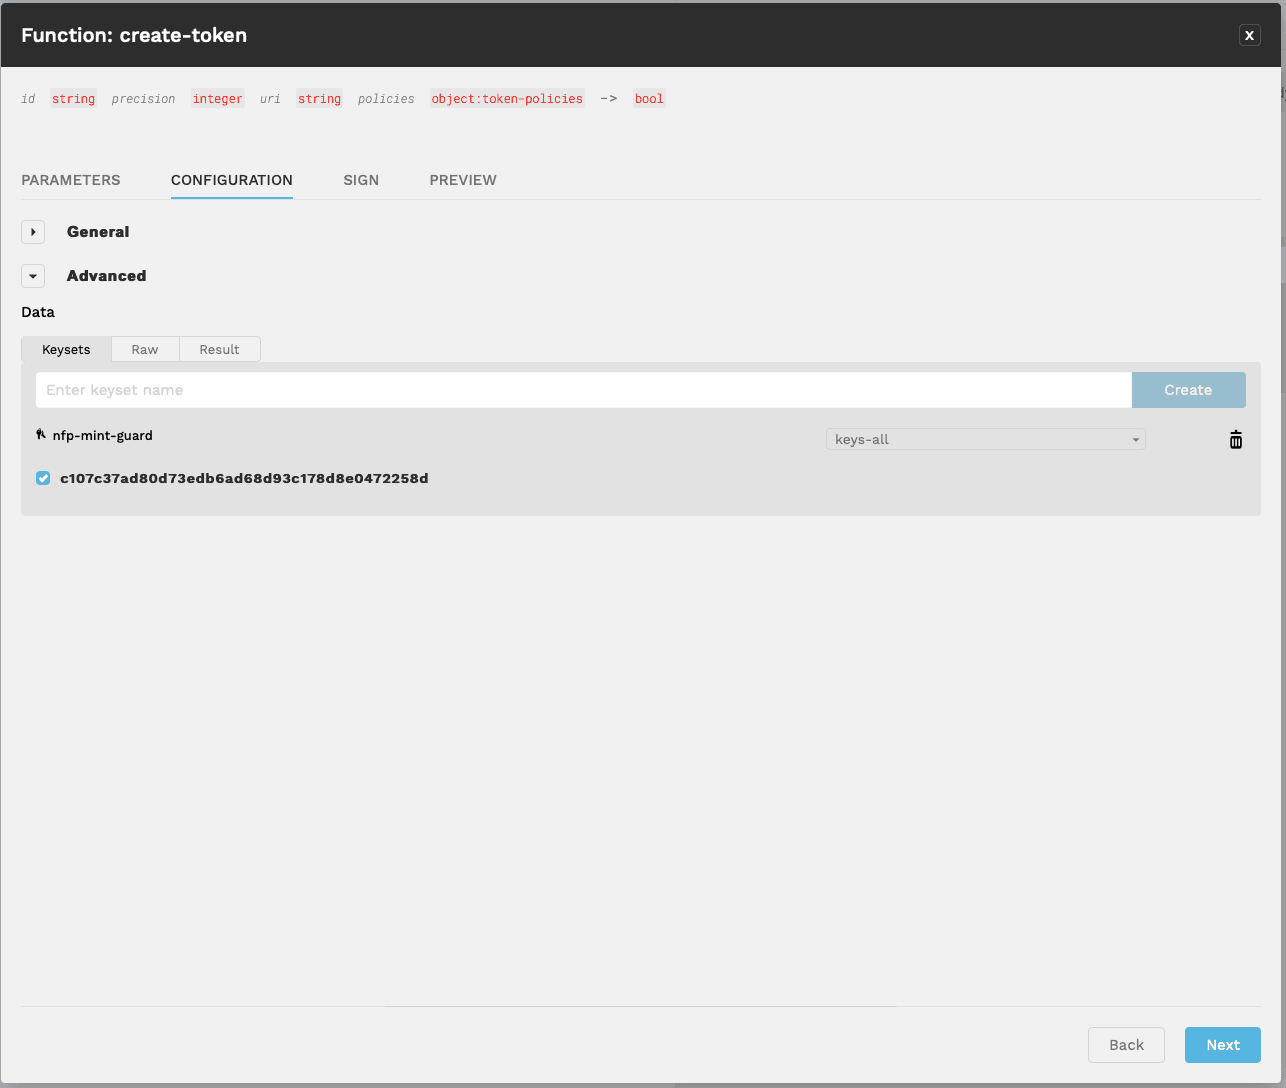
Next, go to the Configuration tab. Like last time, paste your account name and change the gas settings to match the screenshot below.
In the same tab, click on "Advanced" and add a new keyset. In the field, please
enter nfp-mint-guard and hit "Create". Once this is created, you will see your
keysets below it. Please tick the keyset that matches the account we have been
using for this entire process.
Then, you can go to the Sign tab and follow the same steps as before.
Finally, go to the Preview tab and submit your transaction if there are no errors. Wait for the transaction to finish. The server result should be true.
Step 4: Mint the Token
The final step is to mint the token. You can do this by calling the mint
function.
You can find this function in the same menu as the previous functions. Click on "Call" to bring up a popup. In the Parameters screen, you'll need to enter the following information, each on a separate line:
- Token ID: This is the token ID you received in Step X.
- Account Address: This is the address of the account you have been using.
- Guards: Copy and paste
(read-keyset "nfp-mint-guard")into this field. - Amount: Set this to
1.0as this is an NFT.
Next, navigate to the Configuration tab. As before, paste your account name in the relevant field and check the gas settings. Also, the guard we created should have carried over, please check this on the Advanced tab.
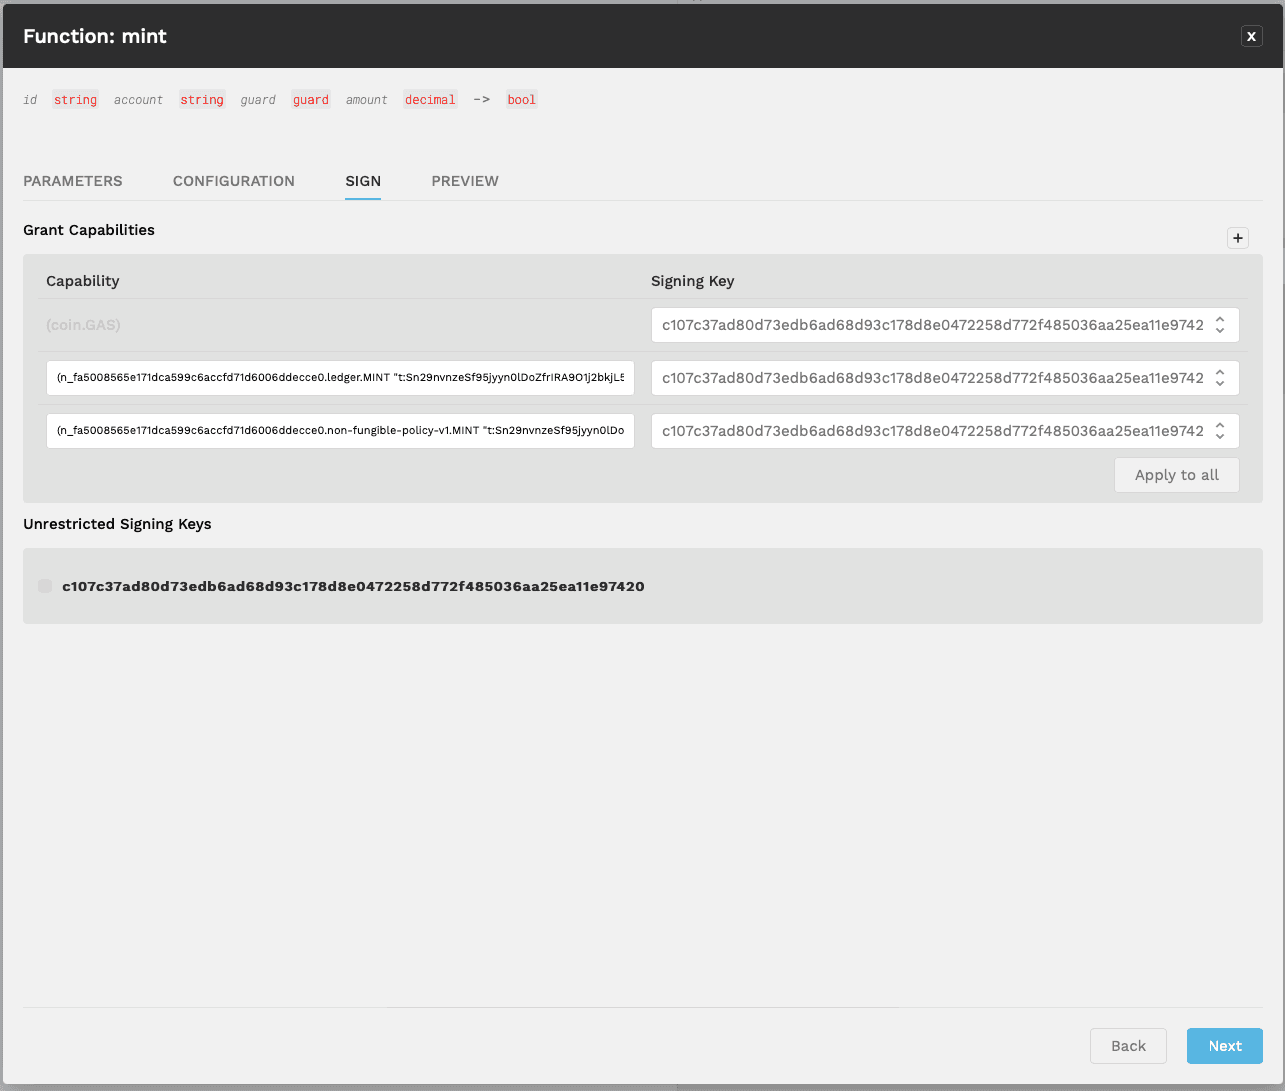
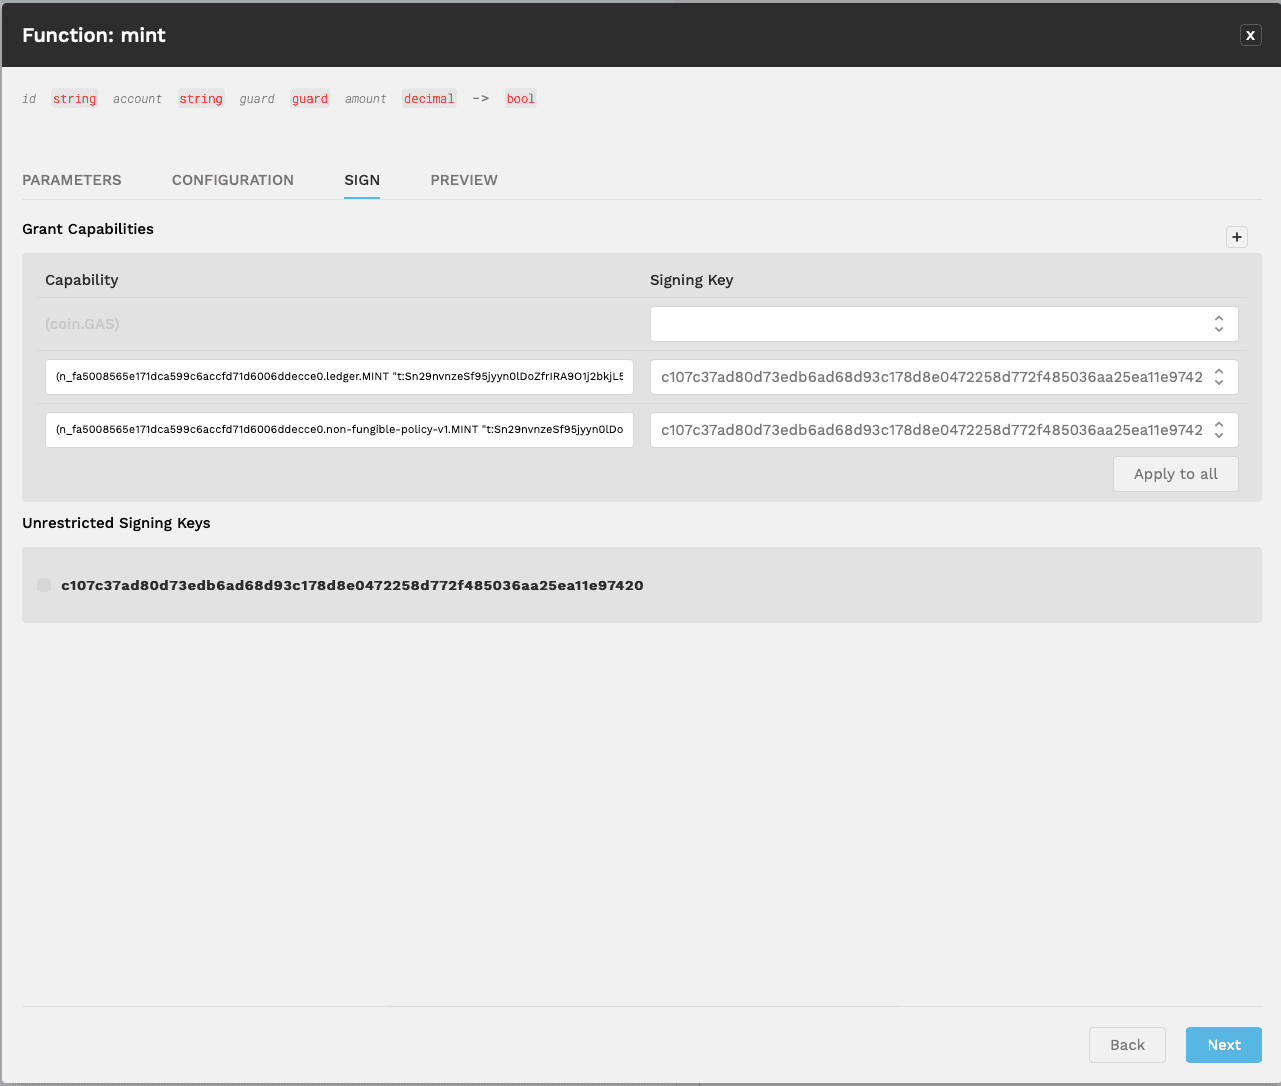
Now, navigate to the Sign tab. This time, things will be slightly different. We need to add new capabilities. On the Grant Capabilities section, there is a plus button on the right-hand side. Click that to add the first one. Please paste the following into the first field:
(n_fa5008565e171dca599c6accfd71d6006ddecce0.ledger.MINT "{TOKEN_ACCOUNT_IN_QUOTES}" "{RECIEVER_ACCOUNT IN QUOTES}" 1.0)(n_fa5008565e171dca599c6accfd71d6006ddecce0.ledger.MINT "{TOKEN_ACCOUNT_IN_QUOTES}" "{RECIEVER_ACCOUNT IN QUOTES}" 1.0)Make sure to replace the things inside brackets, they should both be in quotes. For example:
(n_fa5008565e171dca599c6accfd71d6006ddecce0.ledger.MINT "myTokenAccount" "myReceiverAccount" 1.0)(n_fa5008565e171dca599c6accfd71d6006ddecce0.ledger.MINT "myTokenAccount" "myReceiverAccount" 1.0)Now on the second field select the account keyset we have been using.
We need to add another capability so hit the plus button again and fill in with the following;
(n_fa5008565e171dca599c6accfd71d6006ddecce0.non-fungible-policy-v1.MINT "{TOKEN_ACCOUNT_IN_QUOTES}")(n_fa5008565e171dca599c6accfd71d6006ddecce0.non-fungible-policy-v1.MINT "{TOKEN_ACCOUNT_IN_QUOTES}")Replace {TOKEN_ACCOUNT_IN_QUOTES} with the actual account name, enclosed in
quotes. For example:
(n_fa5008565e171dca599c6accfd71d6006ddecce0.non-fungible-policy-v1.MINT "myTokenAccount")(n_fa5008565e171dca599c6accfd71d6006ddecce0.non-fungible-policy-v1.MINT "myTokenAccount")